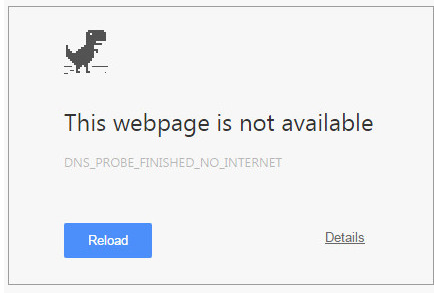
Solution 1: Using Command
Prompt
You can use a straightforward
command line to dispose the error. Open windows command by typing cmd in
windows search box and press enter. You can as well use the following
shortcut keys “Windows Key + R”,
type in cmd and then press Enter. This will open the command prompt
and as soon as it has opened, type “netsh
winsock reset” and press Enter key and then restart your computer.
If the command line
doesn’t solve the problem, your IP address may also cause the connection problem
and you can free the IP and renew it and this might solve the problem.
Open command prompt again, type in ipconfig /release and hit
enter. Once done again type in ipconfig /renew and hit enter again.
Note: Ensure there is a
space between ipconfig and the forward slash.
Now we will flush the
DNS which could be a solution to your issue. Open command prompt again and type
ipconfig /flushdns and then press enter.
Note: Once you have run all
the commands, restart your computer.
Solution 2: Change DNS Address to
Open DNS
This
worked for me entirely well. All I have done is changed my PCs consequently
acquired DNS server locations to Open DNS. Right tap on your system symbol from
windows assignment bar then tap on 'Open Network and Sharing Center'. A short
time later, search for 'Local Area Connection' and tap on it, then from the new
window tap on 'Properties'. At that point select 'Web Protocol Version 4' and
hit "Properties" once more. In the new window select the radio catch
that says 'Use the following DNS server addresses' and after that in the
favored DNS server enclose type 208.67.222.222 and in the other DNS server
confine type 208.67.220.220 and afterward check the crate that says 'Validate
settings upon exit' then snap OK.

This will change your
PCs DNS server locations to Open DNS which is a standout amongst the most solid
free DNS server out there. Presently attempt to stack the site pages that were
indicating error and check whether it has illuminated. In the event that this
strategy doesn't work for you, move to Solution 2.
Solution 3: Clear
Cache, Reinstall your program
1. Clearing Cache in Chrome: To clear the reserve in Google chrome program, tap on the Customize and control catch from the upper right corner and after that tap on Settings. Look down and tap on Show Advanced Settings. Under the privacy segment, click on “Clear Browsing Data”. In the new window check the case that says Cookies and Other site and Plugin Data likewise check Cached Images and Files after that tap on Clear perusing information.
2. Clearing Cache in Firefox: To clear the reserve in Mozilla Firefox, tap on History then clear late history. A while later tap on subtle elements. Check Cookies and Cache from that point and tap on Clear at this point.
You can likewise
attempt re-introducing the program and check whether it resolve the issue.
Another alternative would introduce another program that you haven't been
utilizing as of now. Like Safari or Opera.
Solution 4: Reboot,
Power Cycle Your Router
Reboot your switch
from the switch settings. Get to your switch settings with the URLs given
underneath for different switches. The default username and secret word is:
administrator
- Ø TP-connect – http://192.168.0.1
- Ø Linksys – http://192.168.1.1
- Ø 3Com – http://192.168.1.1
- Ø D-Link – http://192.168.0.1
- Ø Belkin – http://192.168.2.1
- Ø Netgear – http://192.168.0.1.
- Ø Micromax – http://192.168.10.1
When you are signed
in, explore to System Tools > Reboot then tap the reboot catch.
To power cycle your
switch unplug it from the power source and abandon it for no less than 5
minutes and after that connect it to once more. Hold up until the switch
completely begins then attempt to stack the site page.
Solution 5: Check
Firewall and Internet Security Settings
There are
additionally risks that your firewall or web security programming possibly
blocking specific sites for security reasons. Ensure the check the firewall and
web security programming settings and see whether they are bringing about the
issue. Likewise be careful that you incidentally don't visit a pernicious site
obstructed by your firewall.
Solution 6: Try
Uninstalling Any Website Filtering Software
If you are utilizing
sites separating programming then you ought to cripple it or uninstall it. Once
done then attempt to peruse those sites that you were getting error from.
''''./,
ReplyDelete