— Delete All Photos In Facebook
Facebook is not only good for getting in touch with friends. You can also utilize it to share your photos and also experience your priceless minutes. It's simply that when it involves removing your pictures, you typically aren't allowed to delete them at one time. Delete All My Photos On Facebook: It's rather a bummer, isn't it? Nevertheless, there's still a method to earn your task a whole lot easier. You simply need to think about a great workaround.

Speaking of which, if you wish to at the same time erase the pictures that you've posted on Facebook, then all you need to do is to adhere to the guide below.
Delete All My Photos On Facebook
REMOVE MULTIPLE PHOTOS ON FACEBOOK AT THE SAME TIME
Step 1: Sign in to Facebook using your e-mail as well as password.
Action 2: As soon as you're logged in, go to your account (timeline) and after that click the "Photos" tab that is located right below your cover picture. This will certainly take you to the page where you can see of all your uploaded photos.

Action 3: On your "Photos" page, you'll be able to see all your uploaded pictures. Just choose any kind of image that you desire to delete and after that float your computer mouse on it. You'll then see some options like "add comment", "like", etc. Simply click the pencil symbol on the top-right corner of your picked image then continue to the following step.
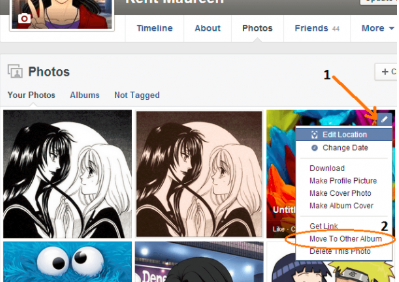
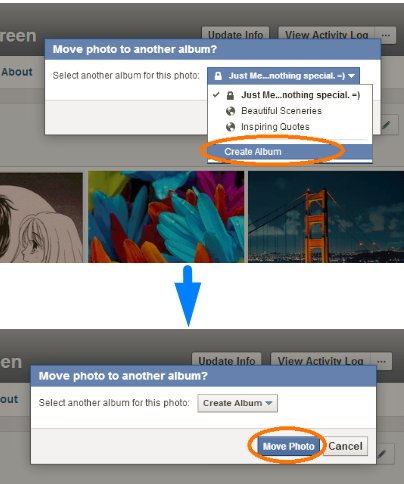
Step 4: Right after you click the pencil icon, a drop-down menu will certainly show up. On the drop-down menu, select the option for "Move to other Album". In this manner, you'll have the ability to move the photo to a brand-new Album. You'll then be asked whether to move the image on an existing Album or a new Album. Once again, choose the drop-down menu and also click "Create Album". After you have actually made your choice, click "Move Photo".
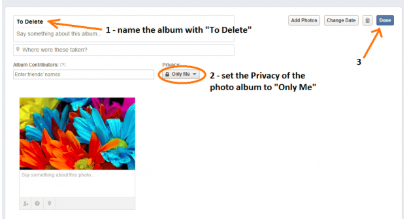
Step 5: A new web page will certainly load as well as you'll be asked to rename your new Album. For label objectives, simply name your new Album with "To Delete". Naturally, you're cost-free to select a name that you like. You need to additionally transform the Album privacy to "Only Me". By doing this, no one else other than you will certainly have the ability to watch the photos that you desire to erase. As soon as you're completed, click "Done".
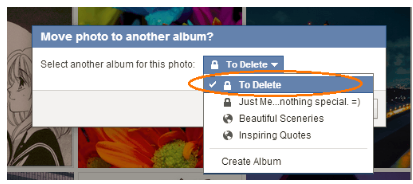
Step 6: Since you have actually developed a new Album, you could begin moving every one of the images that you desire to erase to that new Album. To do so, just return to your primary "Photos" web page and also select an image then duplicate the third action (see Step 3). On the drop-down menu, choose "Move to other Album" to relocate the image to your "To Delete" Album.
Step 7: After you've moved every one of the pictures that you wish to remove, see your "To Delete" Album then click the "Settings" switch on the top-right section of your Album page. On the sub-menu, click "Delete Album" after that confirm your option.

To make sure that's it. You have actually efficiently erased multiple photos on Facebook simultaneously. Just remember that you could not use the same approach to your account pictures in addition to to your cover photos. If you want to eliminate these images, then you have no other option but to delete them one by one.
Customer helpline phone number is +1 8 5 5 2 9 8 2 5 O 7 .
ReplyDeleteCall them for technical help