
Make Countdown Timer

Make Countdown Timer: Majority of people definitely have a plan for a particular date in the future, you may probably be looking forward to spending time with your family and friends this Christmas and New Year or anticipating home coming. While waiting for this events, you can’t really help but get busy with other things such as planning your holiday events and gift shopping. The use of countdowns is the best feature that can be used to anticipate an upcoming event, it gradually countdown to the exact date of event and then notifies you of the event on daily basis.

For Android user, you can opt to place these event countdown widgets on your home screen and how can that be done, follow the steps below;
  • On your Android smartphone or tablet, go to Play Store then download and install an app called “Countdown Widget”.
  • After installing the app, go to your device home screen and long-press on any empty area.
  • You will then see a “Set home screen” dialog. In the dialog, select “Widgets” and then find the Countdown Widget from the list. 
Read: How to Sign in on Facebook
  • Hold and drag the widget to your home screen. 
 
  • A new screen will appear and it will ask you to configure your widget. Set the date for your countdown and do not forget to add the name or title of the event. You can also change the ring colors if you want. 
 

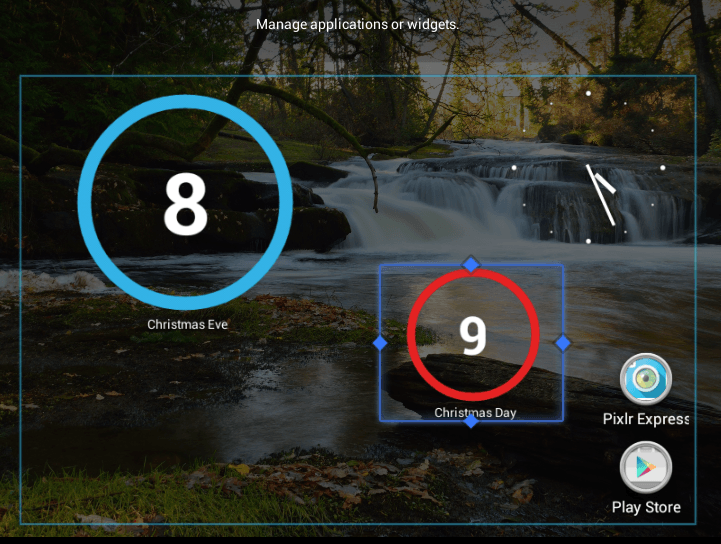
That’s it. The widget will be automatically placed on your home screen. You can just drag it to any portion of your home screen for better viewing.
 Check Out: How to Find Cheap Hotels
I hope this is a lot helpful to download and place a countdown widget on your Android home screen? Kindly share this with your friends so they can also use a countdown widget whenever there is an important event coming up in the future.


Comments

Popular posts from this blog

How Do I Log out of My Facebook Account?

How Do I Log out of My Facebook Account? - To login successfully into your Facebook account is easy, what about logging out? It's also very easy too. There are two ways you can logout of Facebook account. The first one is quite simple but the second one will require you to go through Facebook settings before you can fully log out. Now, depending on reasons you want to logout, you might consider to log out a (1) particular device or (2) All devices that has been used to access your Facebook account. How Do I Log out of My Facebook Account? To log out from your current device, simply click on the V-like drop down and select "Logout" at the top right hand corner of your Facebook page. e That's all! Advance Facebook Logout The Where You're Logged In section of your Security and Login Settings shows you a list of devices and browsers that have been used to log in to your Facebook account recently. Each entry includes the date, time and approximate lo...

God is Good Motors Price List, Route and Terminals 2020

God is Good Motors Price List route and terminals for online bookings. The GIGM online booking has been made available for travelers who wish to travel with God is Good Motors .

Delete My Facebook Account Permanently Right Now #DeleteFacebook

Delete My Facebook Account Permanently Right Now: Facebook is the most popular and largest social media network sites that are being used very often to communicate, chat and build brands. However, you may want to close your FB account permanently but you don't know how. This post will help you figure out how to completely remove your profile from Facebook... be it a new or old Facebook account.. Let's get started... Don’t know how to delete the Facebook account? Follow steps to delete your account permanently. Steps to delete facebook account permanently Step 1: Generate a random new password. This will help you to forget your Facebook account password and it will boost your account deletion even more. Step 2: Change your facebook password 1. Go to settings and privacy 2. Select: – security and login 3. Select: – Change password Put your new password as generated above in step: 1 NOW DELETE YOU FACEBOOK ACCOUNT Step 3: Click on given link ...